First of all get a copy of Visual Studio 2013 Community as described in the following posts.
http://hodentek.blogspot.com/2014/11/free-visual-studio-community-2013-for.html
http://hodentek.blogspot.com/2014/11/you-get-all-this-for-free-in-visual.html
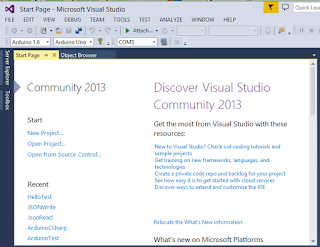
Launch Visual Studio 2013 from its shortcut.

Console01
Click on New Project... to open the New Project window as shown.
Console02
Expand Visual C++ and under Win32 there are two templates as shown.
Console03
Change the name of the project from ConsoleApplicaiton1 to Testing and accept the default location and other items. Click OK.
Win32 Application Wizard opens to the Welcome window as shown. Read the readme.txt file.
Console04
Click Next.
The second page of the wizard (Application Settings)is displayed as shown.
Console05
Since you started with Windows Console application, the application type is already chosen-Console application. You can leave the other options as they are. Click Finish.
The Project folders and files are created as shown in the left and Testing.cpp file is shown on the left. You can build the project and it will build as shown.
Console06
Include in the stdafx.h file which has only the following:
--------------
// stdafx.h : include file for standard system include files,
// or project specific include files that are used frequently, but
// are changed infrequently
//
#pragma once
#include "targetver.h"
#include
#include
#include
// TODO: reference additional headers your program requires here
--------------
Modify the Testing.cpp by replacing the existing code with the
following as shown in the next image.
int main()
{
std::cout << "Hello Jay! ";
std::cout << "I'm not a C++ programmer";
}
--------
Console07
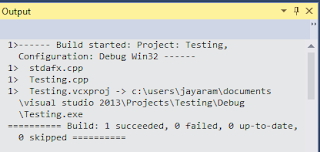
Click Build in the main menu. Build is successful as shown.

Console08
Click Ctrl+F5 to run without debugging. The command window is displayed with the output of the program written to it as shown.
Console09
http://hodentek.blogspot.com/2014/11/free-visual-studio-community-2013-for.html
http://hodentek.blogspot.com/2014/11/you-get-all-this-for-free-in-visual.html
Launch Visual Studio 2013 from its shortcut.

Console01
Click on New Project... to open the New Project window as shown.
Console02
Expand Visual C++ and under Win32 there are two templates as shown.
Console03
Change the name of the project from ConsoleApplicaiton1 to Testing and accept the default location and other items. Click OK.
Win32 Application Wizard opens to the Welcome window as shown. Read the readme.txt file.
Console04
Click Next.
The second page of the wizard (Application Settings)is displayed as shown.
Console05
Since you started with Windows Console application, the application type is already chosen-Console application. You can leave the other options as they are. Click Finish.
The Project folders and files are created as shown in the left and Testing.cpp file is shown on the left. You can build the project and it will build as shown.
Console06
Include
--------------
// stdafx.h : include file for standard system include files,
// or project specific include files that are used frequently, but
// are changed infrequently
//
#pragma once
#include "targetver.h"
#include
#include
#include
// TODO: reference additional headers your program requires here
--------------
Modify the Testing.cpp by replacing the existing code with the
following as shown in the next image.
int main()
{
std::cout << "Hello Jay! ";
std::cout << "I'm not a C++ programmer";
}
--------
Console07
Click Build in the main menu. Build is successful as shown.

Console08
Click Ctrl+F5 to run without debugging. The command window is displayed with the output of the program written to it as shown.
Console09


No comments:
Post a Comment