The best way to install APACHE or the LAMP stack is to use the XAMPP cross-platform web server solution stack XAMPP. All you need to do is to downlaod, extract and start.
You can download XAMPP form
here. You can install version 1.8.3 for Windows from the indicated link. XAMPP was howevver download from here:
http://download.cnet.com/XAMPP/3000-10248_4-10703782.html
The two latest versions are,
XAMPP is documented as a very easy program to install and run, but sometimes if your computer is running other programs like IIS, Skype, SQL Server Reporting Services, Oracle etc as it does on my computer you could get into a situation that makes it hard to install the XAMPP bundle.
The first mistake I made was to download XAMPP to a folder on my desktop. The recommended one is to use C:\XAMPP folder. As I installed on the desktop, the registration in my Windows Services, the file for the service to run location here:
C:\Users\mysorian\Desktop\xampp\xampp\apache\bin\httpd.exe" -k runservice
Any number of install/uninstall operations did not change this path for the executable.
Later I installed XAMPP to C:\XAMPP but took 'apache/bin' contents to the path shown (above figure) in Apache2.4 Properties page.
The downloading and installing from CNET link was quite easy. Here are some screen shots. The next screen is dispalyed when you double click the XAMPP executable.
Click OK.
Click Next.
Click Next to indicate the location of the installation folder.
Click Next.
Click Next.
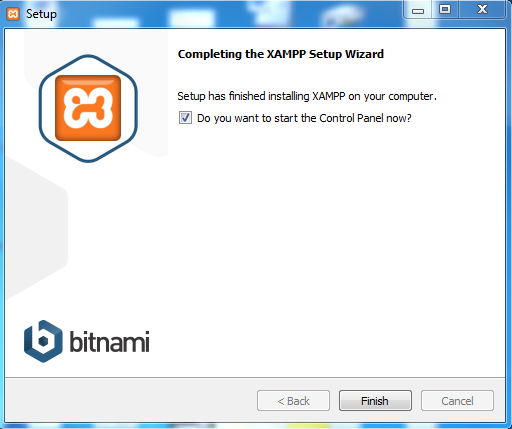
Click Finish
This completes the installation. Now you can double click xampp-control.exe in the installation directory that brings up the XAMPP Control Panel as shown. You can Start, stop and configure the packged programs Apache, MySql etc.

The problem that I encountered were the highlighted error messages reagrding Port 80 and Port 443. These ports are used by default by Internet Information Services and Skype.
I managed to change the ports of Skype. Click here to see how it was done.
In spite of changing the SKYPE's Port 80 to something different and that of IIS binding to a different port, still the errors continued.
Since I could not succeed keeping 80 for APACHE, I decided to change APACHE to listen to a different port (8081) and reverted my IIS bound to its defult 80. I thought I could succeed and XAMPP control continued sending out error messages.
I started apache service from Windows Services and the apache started without any problem after I made adjustment for bin/apache location as mentioned in the beginning.
------5:00:55 PM [main]
Initializing Control Panel
5:00:55 PM [main]
Windows Version: Windows 7 Ultimate SP1 64-bit
5:00:55 PM [main]
XAMPP Version: 1.8.3
5:00:55 PM [main]
Control Panel Version: 3.2.1 [ Compiled: May 7th 2013 ]
5:00:55 PM [main]
You are not running with administrator rights! This will work for
5:00:55 PM [main]
most application stuff but whenever you do something with services
5:00:55 PM [main]
there will be a security dialogue or things will break! So think
5:00:55 PM [main]
about running this application with administrator rights!
5:00:55 PM [main] XAMPP Installation Directory: "c:\xampp\"
5:00:55 PM [main] Checking for prerequisites
5:00:55 PM [main] All prerequisites found
5:00:55 PM [main] Initializing Modules
5:00:55 PM [Apache] Apache Service detected with wrong path
5:00:55 PM [Apache] Change XAMPP Apache and Control Panel settings or
5:00:55 PM [Apache] Uninstall/disable the other service manually first
5:00:55 PM [Apache] Found Path: "C:\Users\mysorian\Desktop\xampp\xampp\apache\bin\httpd.exe" -k runservice
5:00:55 PM [Apache] Expected Path: "c:\xampp\apache\bin\httpd.exe" -k runservice
5:00:55 PM [Apache] Problem detected!
5:00:55 PM [Apache] Port 80 in use by "Unable to open process" with PID 4!
5:00:55 PM [Apache] Apache WILL NOT start without the configured ports free!
5:00:55 PM [Apache] You need to uninstall/disable/reconfigure the blocking application
5:00:55 PM [Apache] or reconfigure Apache and the Control Panel to listen on a different port
5:00:55 PM [Apache] Problem detected!
5:00:55 PM [Apache] Port 443 in use by "C:\Program Files (x86)\Skype\Phone\Skype.exe" with PID 2624!
5:00:55 PM [Apache] Apache WILL NOT start without the configured ports free!
5:00:55 PM [Apache] You need to uninstall/disable/reconfigure the blocking application
5:00:55 PM [Apache] or reconfigure Apache and the Control Panel to listen on a different port
5:00:55 PM [Tomcat] Problem detected!
5:00:55 PM [Tomcat]
Port 8080 in use by "C:\oraclexe\app\oracle\product\11.2.0\server\BIN\tnslsnr.exe"!
5:00:55 PM [Tomcat]
Tomcat WILL NOT start without the configured ports free!
5:00:55 PM [Tomcat]
You need to uninstall/disable/reconfigure the blocking application
5:00:55 PM [Tomcat]
or reconfigure Tomcat and the Control Panel to listen on a different port
The XAMPP -Control contiues to show errors,
My guess is that this control has a problem. It is not related to the configuration of this controller.
But the XAMPP site working at http://127.0.0.1:8081
as shown.
Note: I also had
MariaDB which was interfering with XAMPP's MySQL. I removed MariaDB which allowed me to run MySQL error free.
Summarize the important points:
1. Install XAMPP to C:\XAMPP folder
2. Do not try to change IIS bindings, but change the httpd.config file and choose Apache ports different from that of IIS and Skype.
3. Do the same for other contentions as well.


