Saturday, August 29, 2015

How do I make my Canon MX432 Printer work in my computer with Windows 10 OS?

Now that people are downloading / installing Windows 10 (some thing like 75 Million users in August alone), you will need to make sure that the software and hardware you had earlier works in this new environment. While Wi-Fi connectivity is important, to be able to print to a printer is equally important despite the expensive cartridges.

Canon MX 432 is a pretty good all-purpose printer and there was not much problem to go from Windows XP to Windows 7 and Windows 8. After installing Windows 10 recently, I lost connectivity with the printer even after adding manually the printer previously used with old versions of Windows.


PrinterProblem.png

The LPT1 message points to rectifying the situation by enabling bi-directional support in the Properties dialog box.

Printer properties can be accessed as shown here. Right click the Printer icon and from the drop-down click on the sub-menu Printer properties which points to the printer and the fax device.


PrinterProblem30.png

Click on the Printer to open the Properties window and move over to the ports. Herein you will find the check box.


PrinterProblem3.png

You enable it and go back to try printing, you get the same message as previously. You come back and look at properties again. You will be surprised to see it is disabled. I tried couple of times and then realized that probably driver update is needed.

Bing found me the needed driver at this site:
http://www.usa.canon.com/cusa/support/consumer/printers_multifunction/pixma_mx_series/pixma_mx432#DriversAndSoftware

Canon site is good as I could get the driver although the printer is old.  The site recognized the OS and all I needed to was to get the driver.

PrinterProblem4.png

This image shows the driver details.

PrinterProblem5.png

Download this (mp68-win-mx430-1_02-ejs.exe) to your computer (Toshiba Satellite S70 series) and double click to install. Make sure your printer is turned on and the printer is connected to the laptop with a USB cable.

PrinterCable

Although you are configuring it for operating with Wi-Fi you still need to do this initially so that the printer gets the needed files.

During running the executable the program  recognizes the access point for Wi-Fi connection and on clicking Yes you get connected to the printer and you are ready to go.

PrinterProblem6.png

Here are results from my set up:
===========================================
Setup Results
===========================================

Model :
    Canon MX430 series

  Network Setup of the Printer :
    Completed
    Name :
    Canon MX430 series Printer (Copy 2)
    Port Name :
    CNBJNP_888717BBF935

  Network Setup of the Scanner :
    Completed
    Name :
    Canon MX430 series(88.87.17.BB.F9.35)

  Network Setup of the Fax :
    Completed
    Name :
    Canon MX430 series FAX (Copy 1)
    Port Name :
    CNBJNPFAX_888717BBF935

Network Type :
    Infrastructure
SSID :
    DG1670A72  - Oceanic Time Warner's Home Wi-Fi (using a WiFi enabled cable modem)

=================================


Wednesday, August 26, 2015

Can I access Internet Information Services in Windows 10 using Power Shell?

Using Power Shell Version 5.0 in Windows 10 you can access Internet Information Services on your computer(local site).

This shows the  build details for Windows 10 Version of IIS.


10IIS-00.PNG

In order to work with IIS using Power Shell, you must be,
  • the administrator
  • using Powershell version 5.0
Then you can run simple commands like this. Make the full use of Intellisense and color coding.


10IIS-01.PNG

You can launch Windows PowerShell ISE by searching for it as shown. Somehow typing into the search box does not appear to be fast, it takes breath after each letter and my computer is not old.


10IIS-03.PNG

You can do the same in just Windows PowerShell as well.

Here is the Application pool related cmdlet.
PS C:\WINDOWS\system32> Get-IISSite
Get-IISAppPool

Name             ID   State      Physical Path                  Bindings                                                                      
----             --   -----      -------------                  --------                                                                      
Default Web Site 1    Started    %SystemDrive%\inetpub\wwwroot  http *:80:                                                                    

AutoStart             : True
Cpu                   : Microsoft.Web.Administration.ApplicationPoolCpu
Enable32BitAppOnWin64 : False
Failure               : Microsoft.Web.Administration.ApplicationPoolFailure
ManagedPipelineMode   : Integrated
StartMode             : OnDemand
ManagedRuntimeVersion : v4.0
Name                  : DefaultAppPool
ProcessModel          : Microsoft.Web.Administration.ApplicationPoolProcessModel
QueueLength           : 1000
Recycling             : Microsoft.Web.Administration.ApplicationPoolRecycling
State                 : Started
WorkerProcesses       : {}
Attributes            : {name, queueLength, autoStart, enable32BitAppOnWin64...}
ChildElements         : {processModel, recycling, failure, cpu...}
ElementTagName        : add
IsLocallyStored       : True
Methods               : {Start, Stop, Recycle}
RawAttributes         : {[name, DefaultAppPool], [queueLength, 1000], [autoStart, True], [enable32BitAppOnWin64, False]...}
Schema                : Microsoft.Web.Administration.ConfigurationElementSchema


Of course the important thing is to get an handle on Server Manager and you do this:

PS C:\WINDOWS\system32> Get-IISServerManager


ApplicationDefaults      : Microsoft.Web.Administration.ApplicationDefaults
ApplicationPoolDefaults  : Microsoft.Web.Administration.ApplicationPoolDefaults
ApplicationPools         : {DefaultAppPool}
SiteDefaults             : Microsoft.Web.Administration.SiteDefaults
Sites                    : {Default Web Site}
VirtualDirectoryDefaults : Microsoft.Web.Administration.VirtualDirectoryDefaults
WorkerProcesses          : {}


Now you are cooking. You should also open the default site on your computer and review the objects.


What version of Power Shell is supported in Windows 10?

The version of Powershell is 5.0 in Windows 10 as seen in this response to the $PSversionTable command.


PS5-01.PNG

However version 2.0 also exists as shown here:

PS5-02.PNG
Versions 3.0 and 4.0 are not found on the machine.

There are lots of Power Shell related posts (around 22) and you can access this address to see them all:
http://hodentekhelp.blogspot.com/search?q=Powershell

Tuesday, August 25, 2015

What is a Web Note and how do you use it?

This is one of the coolest features of Microsoft Edge, Microsoft's latest browser (no relative of Internet Explorer).  You can write on your web page or add annotation and send it to your friend(s). Here is the Windows 10 version of Microsoft Edge used for this post.


Medge01.png

Let us say you found something useful and you want to add some annotation, or simply you want to highlight just one item from a bunch of stuff and want your friend to buy it for you as you are rushed. You just highlight that item right on the browser and share it with your friend in a couple of different ways.

We just take this example of sharing some selection you made that you want your friend to look at.

Here is the page you were looking at:


Medge02.png


Now you want to highlight your selection. The following assumes you have a Windows 10 operating system on your computer. Click on the icon under the red square. When you place your mouse tip on it you see text that says 'Make a web page".


Medge04.png

When you click on the icon, the page changes to this.

Medge05.png

Now we are in the editing mode and from top left to right we have some tools. They are, Pan (like scrolling), Pen, a highlighter with yellow tip(you can pick color and size), eraser, 'Add a typed note' item; and clip. On the right you have Save web Note (floppy disc icon), Share and 'Exit'. Presently these are supported and perhaps more may be added in future.

Now let us highlight one of the shoes. Click on the highlighter tool (which is next to the pen' and then with your mouse highlight one of the shoes by dragging your mouse tip around it (can be more than one) as shown.


Medge06.png

Now click on the 'Add a note' icon to the left of clip. A box opens and you can position it by dragging it and type into it as shown.


Medge07.png

Now you want to send it to your friend. Click on the Share on the right mentioned earlier. The share choices open as shown.


Medge08.png

Click on Mail and the next window opens (actually that is the only way I share). Here you will have to setup your email options.


Medge09.png

When I hit Get started, it brings up my Windows mail at live.com as shown. You can add other accounts if you want like gmail, etc.


Medge10

Sure enough the mail can be sent.


 Medge11.png

The mail can be retrieved.

Medge12.png

Well. What are some problems that I encountered?


  • I am documenting the steps to help readers and going back and forth to get the correct screen shot can mess up with the natural flow of a program. However, while trying to share information the edited page may loose some information. 
  • Going from editing stage to sharing stage should retain edited information  no matter how many times I go between the browser and the Share settingss.
  • The image that is sent appears to be the whole web page rather than the one in the images shown. Perhaps, this is my bad. One may need to clip further so that only a short message is sent.
  • There must be more Share choices, perhaps there will be a way to add choices in the future.
But this is a great improvement. I think DHTML has come to some maturity.


Sunday, August 23, 2015

How do you reduce the size of a video?

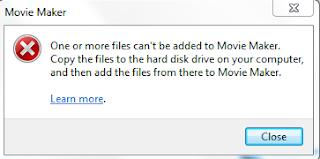
You should trim the video to the size you want. In order to do this you have to use some kind of a program. Microsoft Movie Maker is one such program which can be used to trim a video.

I had used this program (Version 5.1 (Build 2600.xpsp_Sp3_gdr.090206-1234: SP3)to edit a video on my Tilt phone described here:
http://hodentekmobile.blogspot.com/2009/05/adding-video-clip-to-your-tilt.html

You can get the Microsoft Movie Maker for your operating system from here except for Windows RT and Windows 8.1 RT. Movie Maker is just one program in the bundle and you can choose just to install it or choose all of them.

I downloaded Microsoft Movie Maker for Windows 7.

I had a video captured which was too long to embed in my blog and I had to reduce the size.
The Original size was 166045 KB and I wanted something under 50000 KB. I reduced the length of the video from over 78 seconds to 40 seconds using the Windows Movie Maker. The original was a mp4 video captured from a TV display using the Nokia Icon.

Original
Original.png
 Final
EditedOriginal.png

Since I wanted only the last 40 seconds I adjusted the start and stop to this duration.

Here are a few screen shots with some brief explanations. Launching the Movie Maker.


TrimVideo01.png


Browse to bring a video after clicking Add Videos and Photos menu in the previous screen.

TrimVideo02.png
You need to get the video from your phone to desktop. Not allowed directly from phone.


TrimVideo03.png

Add Video to project.

TrimVideo04.png

Click Edit to edit this video.


TrimVideo05.png


This is a trial Star (50.00sec)t/stop time(78.1 sec) setting. You can type into the boxes or use the drop-down handle.

TrimVideo06.png
There are other settings that you can use, for now I am just fiddling with Start and Stop.

This is another trial with reduced duration.

TrimVideo07.png
This is the final setting.

TrimVideo08.png
You can view the video you edited in the Movie Maker and you can save the movie by giving a name.


TrimVideo09.png
Start and stop can be independently adjusted.


Did you know that you could open the application like this?

  • You can double click an item on the dekstop to open an item.
  • You can right click the item and click Open in the pop-up menuor

OR
You can drag and drop the item from desktop on a Command Prompt window.

Here is a an image on the desktop that I drag on to the Command prompt window.


DragnDropDesktopItem.png

How do I set up the transparency control for the Command Prompt window in Windows 10?

In Windows 10 (Version 10.0.10240) you can adjust the transparency of the Command Prompt window and you will be able to read text on a screen behind it. In some cases it could be a very handy feature.

How do you enable this feature?

The next image shows the Command Prompt window on a computer running Windows 10.


cmd01.png

Right click the title (top of above page) to display the Properties pages as shown:

cmd02.png

Switch to the Colors tab and you get the following screen:

cmd03.png

You will notice that the Opacity control is present at the bottom of the screen but not enabled.

How do you enable it?

Go back to the Options screen and take away the check mark on Use legacy console.


cmd04.png

Now go back to Colors tab again and you will see it is enabled.

cmd05.png

Now I adjusted it to around 50% and dragged the Command Prompt window over my Notepad document as shown. You can read the text on my Notepad through the partially transparent Command Prompt window.

cmd06.png

How is ODBC managed on Windows 10 computers?

In Windows 10 have access to both x32bit and x64bit versions of ODBC Data Sources Administrators. ODBC stands for Open Data Base Connectivity. You can ODBC Data Source Administrator  from Control Panel | System and Security | Administrative Tools. If you want to use them frequently you can pin them to the Start menu (you may find it not working as of now, but probably will be fixed in the future).

While the x32bit version has more drivers, the x64bit has fewer drivers as seen in the following images.

Access ODBC Data Sources from Administrative Tools as shown here. You can double click these here to open them.

 Here are the x32 bit drivers.


 Here are the x64 bit drivers.

The PDWODBC is for connecting to Parallel Data Warehouse where applicable.

Friday, August 21, 2015

Can you add a Identity Column to an existing populated table?

Primary Key is a chief requirement for establishing relationship between tables. In case you have table which has no column providing the Primary Key which auto-increments then you should add this column.

Yes you can, you can use T-SQL code or SQL Server Management Studio. This post shows you how, step-by-step. I will be using SQL Server 2012 but the procedure is similar with probably some very minor variations in other versions.

The first thing is to make sure that when you save changes the table is not recreated. You can do this by removing the check mark from here (Prevent saving changes that require table re-creation).
The Options menu is accessed from Tools | Options... .


Creating a table with three columns:

I will be creating a new table in a database Manoa in an instance of SQL Server. Using the drop-down shown you can create a new table.


When you click New Table... above the next pane opens in SSMS with a default table name Table_1 which can be changed to the one you give after configuring it as shown.  Enter Fname under ColumnName, then Data Type comes up as nchar(10). If it does not you can select from the list. Place check mark for Allow Nulls (which means this column may have a value or may not, it is nothing unless something is entered).


When you close this window, the next window is displayed.


When you click Yes, the above table will be saved and you get the opportunity of overwriting the default name with one of your own as shown.

'
Herein table name was changed to Client. The table Client gets created which you can see in the Table node in Object Explorer. You may need to refresh the Table node (by right clicking and choosing Refresh). The next picture shows the columns of the Client table and the columns that you added.


Populating the table with 3 rows

Right click dbo.Client under the Tables node. From the drop-down select 'Edit Top 200 Rows '.  The next window will be displayed with just the first two with all Nulls. Enter the names by clicking on the Nulls under Lname; then under Fname and then under age. When you finish the 1st row, the second row is displayed again with Nulls. Repeat the above using names shown (you may user your own but of proper data type) for rows 2 and 3. We assume only 3 rows to exist in this table.  It can contain any number of rows. Click the Close(x) button.


The table gets saved with the values you entered. When you run the Select query as shown, you will see the three rows with values you entered. The column with no name shows just the row numbers.


Adding the Identity column

Right click dbo.Client table in Object Explorer in the Tables node. The following window with two panes open as shown. You may need to click the 4th row below the one with Lname 'Amanda' in the above to add the Id column.


For ColumnName enter 'Id'. For DataType enter or choose 'tinyint' and place check mark for Allow Nulls as shown. The bottom pane is automatically populated as shown.


In the bottom pane scroll down to the line shown, 'Identity Specification' .  Change from 'No' to 'Yes' indicating you want Id to be an identity column. The Identity Increment and Identity Seed gets filled with default values and you will notice that the check mark for Allow Nulls is removed as soon as you make these changes.


After making Id the identity column your table design is displayed as shown.


Again run a Select statement as shown and you will see the Id column as being added to your table.


Adding the Primary Key
 Now that you have added the Identity column, you will now designate that column to contain the Primary Key.

Open the table in design view.  Highlight the row containing Id and then right click that row to open a drop-down menu as shown.


Choose, Set Primary Key. The Id column will now show a 'Key' left to the column as shown.


After the above step, you will have set the Identity column to have the Primary Key. Expand the dbo.Client table as shown to see the 4 columns and the Key you added.


This completes the procedure to add an identity column to a pre-existing, populated table.