Wednesday, November 30, 2016

What are IoT Gateways?

IoT Gateways connect IoT Devices or 'Things' to some kind of computing platform or to the cloud to provide intelligence for the IoT Solution. Although it is possible to directly connect the device to cloud if some form of intelligence to be derived before going to the cloud, a Gateway is a better solution.

If devices are TCP/IP enabled as in modern devices connecting them to the cloud is easy but there are legacy devices which are not TCP/IP enabled and therefore they need an intermediary device to connect to the cloud.

These are some of the reasons that requires an intermediary Gateway:

  • Support for legacy devices 
  • Run edge analytics- Reduces communication bottleneck by pre-processing (batching, filtering, compressing etc) 
  • Minimize Latency- processing near edge faster than in the cloud 
  • Conserve network bandwidth- 
  • Reliability of operation- 
  • Address security- Gateways can provide an extra level of security
Microsoft Azure IoT Gateway:
In the case of Microsoft technology, Microsoft Azure IoT Gateway helps developing a solution for on-premises computation augmenting the functionality provided by Microsoft Azure cloud services. Microsoft Azure IoT Gateway can be used to create a gateway solution.

More here:
https://azure.microsoft.com/en-us/blog/introducing-the-azure-iot-gateway-sdk-beta/

Intel Corporation:
Intel IoT Gateway connects legacy and New systems for seamless and secure data flow using pre-integrated, pre-validated Hardware and Software Blocks

Of course both Legacy and New systems are supported. Perhaps there are more legacy devices than the new ones.

Intel IoT Gateway is built on McAfee and Wind River using their security and operating system technologies.

IntelIoTGateway_00

A variety of programming languages can be used:


Dell.com

Dell's Edge Gateway 5000 also provides Gateway solutions for transporting information from edge devices to the end point computing cloud.

Here are some specs for the Dell's Edge Gateway 5000
Spec: https://qrl.dell.com/Files/en-us/Html/Z5000/Spec%20Sheet.html

Processor
   
1).
Intel® Atom™ E3825 1.33GHz | 2 cores
Memory: 2G (4x256Mx16 DDR3L)
1067MHz

2)   
Intel® Atom™ E3827 1.75GHz | 2 cores
4G (8x 256Mx16 DDR3L)
1333MHz

Manageability:
WindRiver: Helix Device Cloud for Linux
Ubuntu Snappy(https://developer.ubuntu.com/en/snappy/) and Windows IoT Industry

There are some useful video's on Dell's Gateway (you may find others on the Internet) that explains in simple terms what their gateway provides
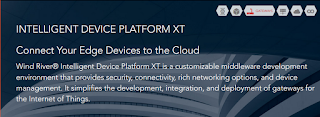
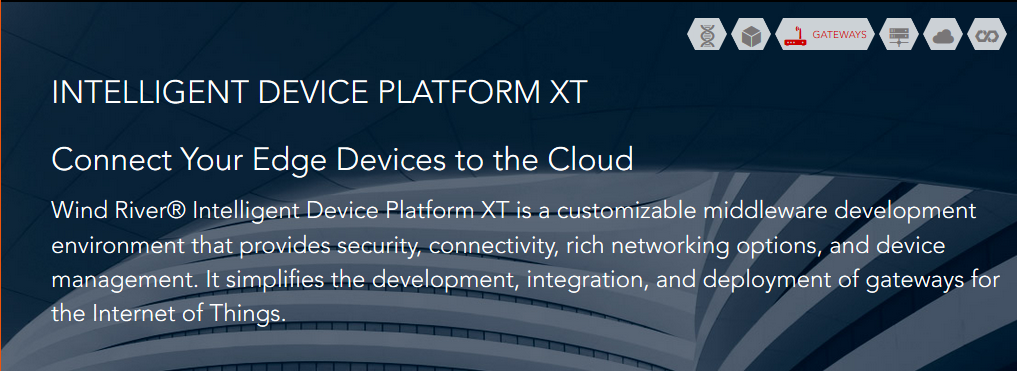


Wind River
Wind River is an Intel company and call their Gateway as Wind River Intelligent Device Platform XT
They use Intel SoC and other Intel products.

http://windriver.com/products/product-notes/PN_IDPXT/PN_IDPXT.pdf

Intel Products: Intel Baytrail, Intel Quark and Intel Core and propriety software(Wind River Intelligent Device Platform XT 3, Wind River Workbench, McAfee Embedded Control 6.6)


The trend is more towards Open Source than proprietary, a movement most suited for IoT development. Looks like Intel will make a lot of money with IoT.

Sunday, November 27, 2016

What is Polyfill as related to JavaScript?

In the early days of Internet (some 10 years ago or so) one had to write some kind of code that recognizes the browser and control the flow so that the audience is given the information that there was no browser support for the functionality.

An extreme kind of instruction was that the browser's JavaScript functionality was not on, etc.

A Polyfill ( piece of code, plug-in,add-in, script) is a browser fallback so that feature(s) works in a modern browser also works in older browsers which per se did not support what is supported in the modern browser.

Here is a comprehensive collection of HTML5 Cross Browser Polyfills.

The term Polyfills was coined by Remy Sharp to describe JavaScript shims that replicate standard API found in modern browsers for those older browsers that do not support.

Polyfills are created by developers to fulfill this requirement and one can create ones own Polyfill .

One of the most popular Polyfills is htmlshiv (https://github.com/aFarkas/html5shiv)

In IE versions of 9.0 and prior versions
and would have been parsed as empty elements. These tags however described nesting of elements and styling them would have been difficult. Html5shiv takes care of this by directing the page if opened in IE 9 to use the appropriate script:


Wednesday, November 23, 2016

How do you retrieve JSON formatted data from SQL Anywhere 17?

SQL Anywhere 17 is a SAP Database.  Some of the earlier versions were released by SYBASE.

In SQL Anywhere 17 you have three different ways of getting JSON formatted data / JSON document.

You can use the FOR JSON clause  with:

  • SELECT Statement
  • Subqueries
  • Queries having Group By clause
  • Aggregate Functions and
  • Views
The result is a JSON array consisting of:

  • Scalar elements
  • Objects
  • Arrays
There are three ways of calling the FOR JSON Clause:

  • For JSON Raw
  • For JSON AUTO
  • For JSON Explicit
Note that SQL Server 2016 did get JSON support for the first time and has only For JSON Auto clause.

You run SQL Queries in Interactive SQL. Here is an example of a query that provides json document using the FOR JSON AUTO clause.


InteractiveSQL17JSON

Tuesday, November 22, 2016

Do you want to create apps using streaming data?

Apps that use streaming data can be created with many programming languages including HTML, .NET, etc. with full SDK support.

According to this site,
"PubNub is a global Data Stream Network (DSN) and easy-to-use secure realtime communication API for IoT, mobile and web apps. The service scales to hundreds of millions of devices with 1/4-second worldwide latency and over 70 SDKs"

This is the stuff you should look into if you are interested in streaming data.

Here are developer support items that you may be interested in.

Mobile
Web

IoT

Games

Server Desktops


How do you create a Power Bi report using JSON data? Continued


This is a continuation of my previous post.

Once the query is properly created turning it into a report in Power BI is quite easy. It takes only a couple of clicks. Here is the last query in the previous post.

The column data types are text and you need to change them. Clicking each column you can change the data type. The title_id is kept as is text. The qty was changed to whole number as well as the ytd_sales column. The Amount column was changed to decimal. Here are the allowed data types in PowerBI.

Now that the plot data is ready you can click the first menu item, Close & Apply in the Query editor.

Now you place Id in the Axis and the other three (Qty, Ytd_Sales, Amount) in the value fields to display a Clustered Column Chart as shown.
or a Multi-row card report as shown.


You can also choose any other chart type.

Monday, November 21, 2016

How do you create a Power Bi report using JSON data?

Power BI supports retrieving data from a variety of data sources that includes data in JSON format.

In the post you will learn how to retrieve JSON data from SQL Server 2016. You then retrieve this data into Power BI to create a report.

Creating a report requires massaging the JSON data retrieved using the Power BI user interface.

Creating JSON formatted data:

If you want to know how to retrieve JSON formatted data from your database in SQL Server go here:
http://hodentekhelp.blogspot.com/2016/11/how-do-you-retrieve-json-formatted-data.html

Here is the data that is going to be used in this post. The data is from a query against the pubs database (original compatibility 100) whose compatibility is changed to work with SQL Server 2016.


JsonPowerBI_00

You can run the query and save it as a file. Make sure there are neither extraneous characters in the file (like some sql message) nor does it have white spaces in side the JSON data.

Getting JSON Data into Power BI:


It is very easy to get the JSON data into Power BI. Just use the Get Data menu item in Power BI.

If you want to know details of how to retrieve JSON formatted data into Power Bi go here:
http://hodentekmsss.blogspot.com/2016/11/retrieving-json-data-in-power-bi.html

The data that was created in SQL Server is now retrieved into Power BI.

This is the first step. The data comes into Power BI as a list.
============
JsonPowerBI_01

 This is the formula behind this.
============
Json.Document(File.Contents("C:\Users\Jayaram\Documents\Blog2016\HodentekMSSS2016\Pubs11_20.json"))
==========
You can convert this list into a table using the menu ribbon item To Table in Convert.
After this the UI appears as shown with the list converted to a table.


JsonPowerBI_02.PNG

This is the formula behind this conversion:
=======
= Table.FromList(Source, Splitter.SplitByNothing(), null, null, ExtraValues.Error)
=========
When you click on a single  record this is what you see.
======


JsonPowerBI_03.PNG

The first record has three items shown at the bottom.

Now you can expand the record by clicking on the icon shown on the column 1 to split it into the items by continuously clicking it.

First cancel the dialogue that showed up earlier. Next click on Column1 and then click the icon to expand the column.

This is what happens the first click.
=======


JsonPowerBI_04.PNG
====

After clicking OK, this is what you will see in the Power BI UI.


JsonPowerBI_05
The formula behind the above is as shown here:
========
= Table.ExpandRecordColumn(#"Converted to Table", "Column1", {"qty", "title_id", "titles"}, {"Column1.qty", "Column1.title_id", "Column1.titles"})
============
As you can see that Column1.titles is still a list (and therefore can be expanded).
 ======
This can be further split by clicking on the icon in Column1.titles.

When you click this icon, you will see the following change.
You will observe that the list goes over into Record and the following is displayed.


JsonPowerBI_06

Click OK.
The display changes to this.


JsonPowerBI_07

Observe that there are no more columns ot be expanded.
The formula now appears as shown:
=============
= Table.ExpandRecordColumn(#"Expanded Column1.titles2", "Column1.titles", {"Amount", "ytd_sales"}, {"Column1.titles.Amount", "Column1.titles.ytd_sales"})
=============

Renaming the columns

You can right click on a column and from the drop-down menu rename it. The renamed columns appear like this as shown below. while renaming a column, you may get a message Insert Step. Just click Insert for the message and go to the next column.


JsonPowerBI_08

The formula behind the above is this:
==============
= Table.RenameColumns(#"Expanded Column1.titles3",{{"Column1.qty", "qty"}, {"Column1.title_id", "title_id"}, {"Column1.titles.Amount", "titles.Amount"}, {"Column1.titles.ytd_sales", "titles.ytd_sales"}})
============
The various steps to get to this stage is shown here:


JsonPowerBI_09

Now we have prepared the query and ready to create a report.

Continued in Part 2 here:
Creating a report using JSON formatted data with Power BI - Part 2

Thursday, November 17, 2016

How do you retrieve JSON formatted data from SQL Server?

You can use 'FOR JSON AUTO' at the end of your regular SQL Query to retrieve data from the query in JSON format. You can only use this in SQL Server 2016.

Here is an example from AdventureWorks2014 database in SQL Server 2016. The query is as follows. It is a simple query that return 17 rows of data of 'Persons' living in area code 808.

============
SELECT        Person.Person.BusinessEntityID, Person.Person.FirstName, Person.Person.MiddleName, Person.PersonPhone.PhoneNumber
FROM            Person.EmailAddress INNER JOIN
                         Person.Person ON Person.EmailAddress.BusinessEntityID = Person.Person.BusinessEntityID INNER JOIN
                         Person.PersonPhone ON Person.Person.BusinessEntityID = Person.PersonPhone.BusinessEntityID
                         Where PhoneNumber like '808%'
For JSON Auto


===============

The response to this query is as shown here:
==========
[{"BusinessEntityID":1,"FirstName":"Ken","MiddleName":"J","Person.PersonPhone":[{"PhoneNumber":"808-722-6655"}]},{"BusinessEntityID":188,"FirstName":"Douglas","MiddleName":"B","Person.PersonPhone":[{"PhoneNumber":"808-555-0172"}]},{"BusinessEntityID":2766,"FirstName":"Alexandra","MiddleName":"M","Person.PersonPhone":[{"PhoneNumber":"808-555-0111"}]},{"BusinessEntityID":3913,"FirstName":"Abigail","Person.PersonPhone":[{"PhoneNumber":"808-555-0111"}]},{"BusinessEntityID":4933,"FirstName":"Devin","MiddleName":"I","Person.PersonPhone":[{"PhoneNumber":"808-555-0131"}]},{"BusinessEntityID":7754,"FirstName":"Reginald","MiddleName":"C","Person.PersonPhone":[{"PhoneNumber":"808-555-0181"}]},{"BusinessEntityID":7976,"FirstName":"Danielle","Person.PersonPhone":[{"PhoneNumber":"808-555-0114"}]},{"BusinessEntityID":8986,"FirstName":"Bailey","Person.PersonPhone":[{"PhoneNumber":"808-555-0180"}]},{"BusinessEntityID":11434,"FirstName":"Nicole","Person.PersonPhone":[{"PhoneNumber":"808-555-0169"}]},{"BusinessEntityID":12741,"FirstName":"Alexis","MiddleName":"E","Person.PersonPhone":[{"PhoneNumber":"808-555-0189"}]},{"BusinessEntityID":13010,"FirstName":"Emily","Person.PersonPhone":[{"PhoneNumber":"808-555-0115"}]},{"BusinessEntityID":15571,"FirstName":"Adam","MiddleName":"R","Person.PersonPhone":[{"PhoneNumber":"808-555-0157"}]},{"BusinessEntityID":16094,"FirstName":"Jason","Person.PersonPhone":[{"PhoneNumber":"808-555-0157"}]},{"BusinessEntityID":17444,"FirstName":"Thomas","MiddleName":"A","Person.PersonPhone":[{"PhoneNumber":"808-555-0120"}]},{"BusinessEntityID":19244,"FirstName":"Brianna","MiddleName":"C","Person.PersonPhone":[{"PhoneNumber":"808-555-0149"}]},{"BusinessEntityID":19425,"FirstName":"Victoria","MiddleName":"A","Person.PersonPhone":[{"PhoneNumber":"808-555-0135"}]},{"BusinessEntityID":20771,"FirstName":"Isabella","Person.PersonPhone":[{"PhoneNumber":"808-555-0174"}]}]
----------------